The KAPtery closed on December 31, 2024. Products can no longer be ordered from these pages. Some products are available for purchase from Ennapurna in France. For questions, replacement parts, special requests, or leftover inventory, use the Contact page above.
Producing Picavets and Pendula
When the KAPtery’s new site opened this month, there were a few new kite aerial photography products for sale. Two of them were kits to build a suspension to connect a camera rig to a kite or balloon line. The KAPtery has always sold kits for Picavet and pendulum suspensions, but the new ones are different for two reasons.
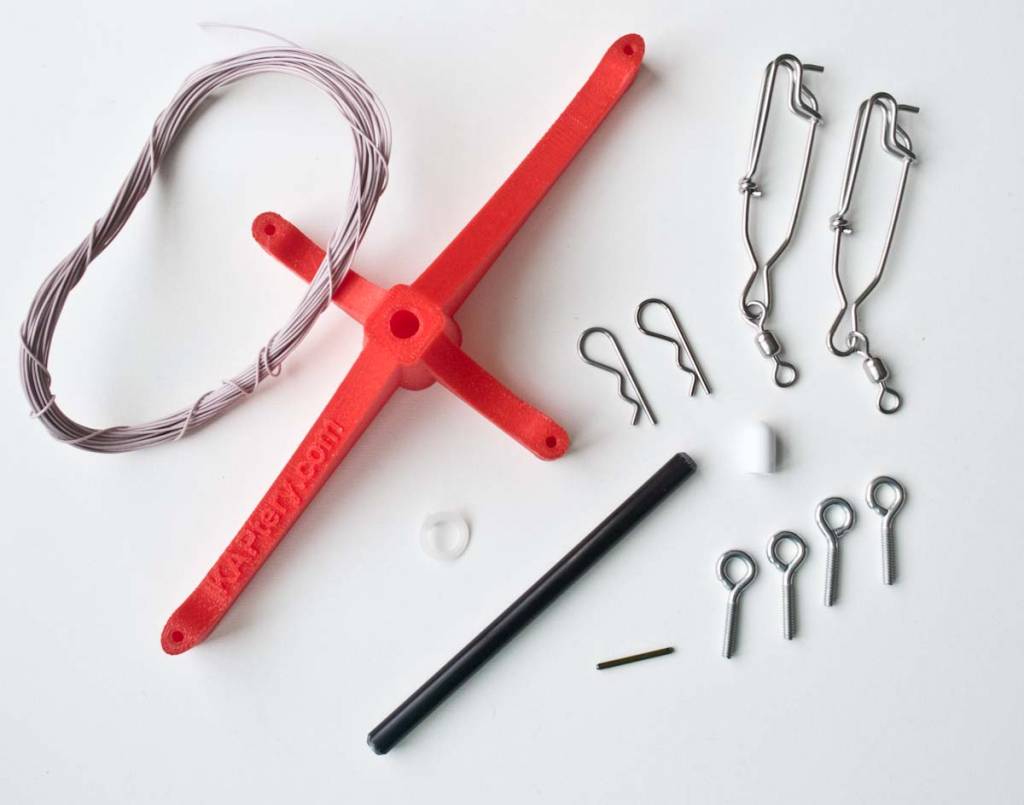
The new Picavet Kit with one piece of solid fiberglass rod for the short shaft under the Picavet cross.
The old kits were hard to make because lots of gluing and drilling was required. I felt guilty about making my customers do all that work (or maybe I just needed more of a kit mentality), so I gradually started doing most of it myself and selling ready-to-fly products. But I didn’t make enough profit on these sales to pay myself minimum wage, so I had to redesign the products.
Originally the shafts for the Picavet and pendulum were made from wrapped carbon fiber tubes. These are very lightweight and are the fanciest type of spar used in quality kites. But it’s hard to connect anything securely to the ends of the tubes. I wanted to drill a hole for a cotter pin which passed through the camera rig, but I was worried that the tube walls were too brittle to tolerate the potential stresses. So I reinforced the ends (or the entire 5” Picavet shaft) by gluing a fiberglass tube inside and then gluing a plastic rod inside that. It worked great but was rather tedious (and two-part-epoxy messy).
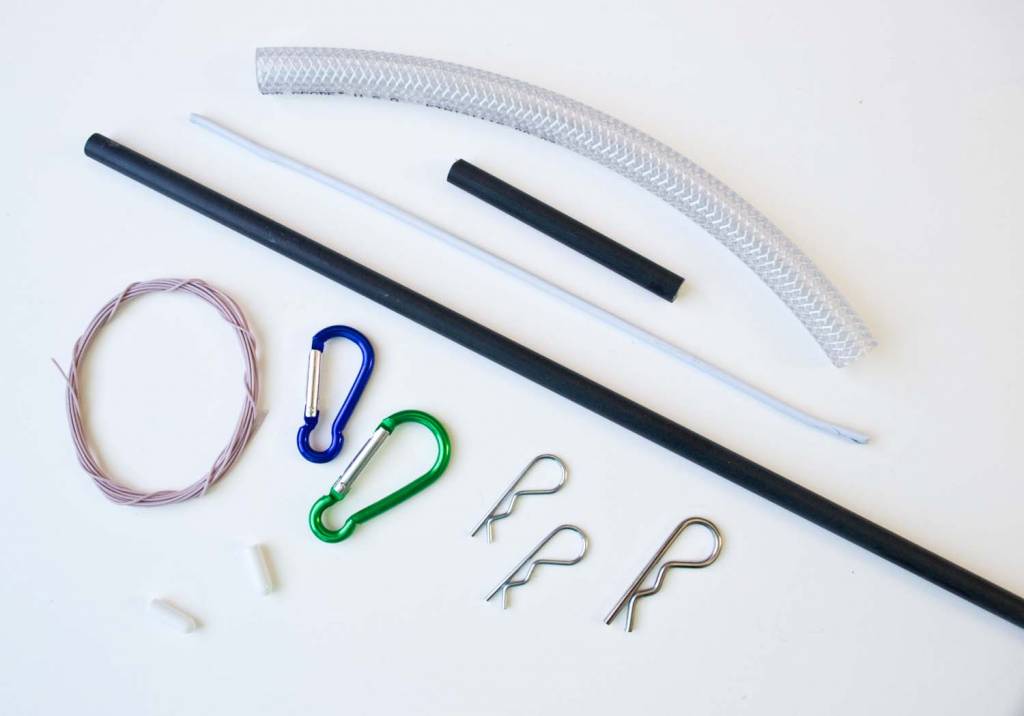
The new Pendulum Kit with two pieces of G50 fiberglass tube. The long one becomes the 38 cm pendulum shaft.
So last month I bought a bunch of solid fiberglass rods of a slightly greater diameter. These are pretty heavy compared to the carbon tubes, but by the time I filled the old tubes with epoxy and fiberglass there wasn't much weight difference. So these solid rods are the new 5” shafts on the KAPtery Picavet suspension. Three holes have to be drilled and a short metal piece must be glued in place, but it’s much easier than it used to be.
The pendulum shaft is 38 cm long, and using the solid rods would make it rather heavy. So I bought some fiberglass tubes with slightly greater diameter and thicker walls than the original carbon tubes. These are strong enough with just a cotter pin through them, and these are the new 38 cm long shafts for the KAPtery Pendulum suspension. The hardest thing you have to do to prepare the pendulum is drill a few holes and bend some stiff wire.
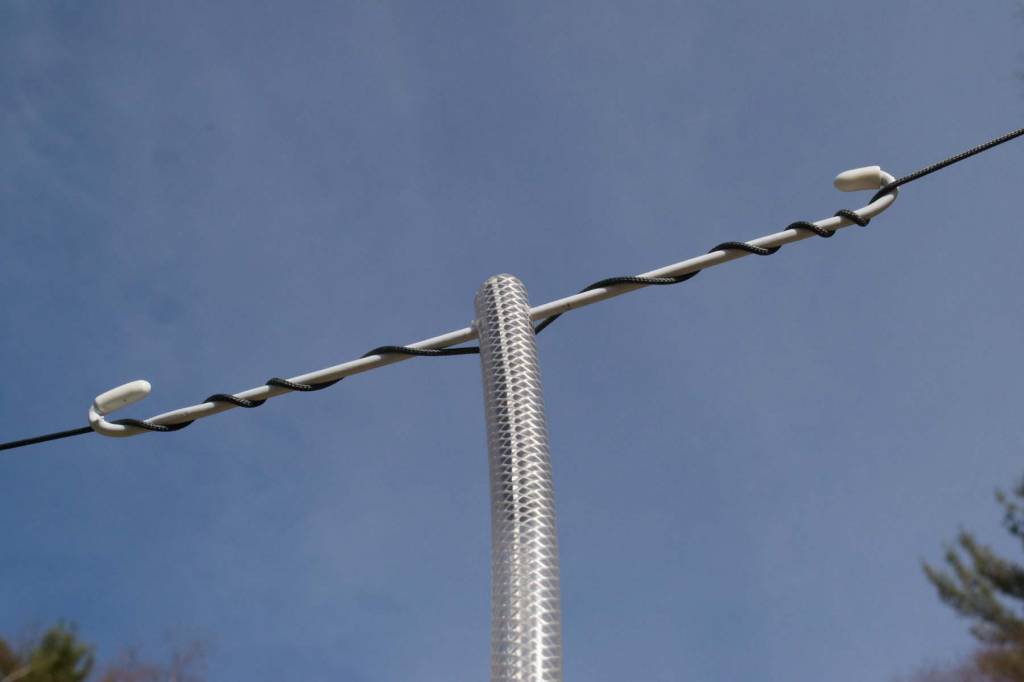
The top part of an assembled KAPtery Pendulum. A short piece of fiberglass tube inside the upper end of the flexible tubing is a stiffener that helps keep the camera rig away from the flying line.
So the new kits are much easier to assemble into working suspensions and should be a fun way to get your camera hanging the way it should. Preparing the shafts is so easy that I will continue to do it myself and sell ready-to-fly Picavets and Pendulums in addition to the kits. There is also a kit for a Picavet that includes no 3D printed Picavet cross, for those who can get their own printed.
There are parts lists and assembly instructions for these products at the KAPtery Guides page.
|
Product |
Price |
|
Picavet (mostly ready to fly) |
$30.00 |
|
Picavet Kit (assembly takes 2 hours) |
$25.00 |
|
Picavet Hardware (no 3D printed cross) |
$16.00 |
|
Pendulum (ready to fly) |
$26.00 |
|
Pendulum Kit (assembly takes 1.5 hours) |
$23.00 |
These prices include shipping and were valid in March 2015.
