The KAPtery closed on December 31, 2024. Products can no longer be ordered from these pages. Some products are available for purchase from Ennapurna in France. For questions, replacement parts, special requests, or leftover inventory, use the Contact page above.
Ellie's Rokkaku
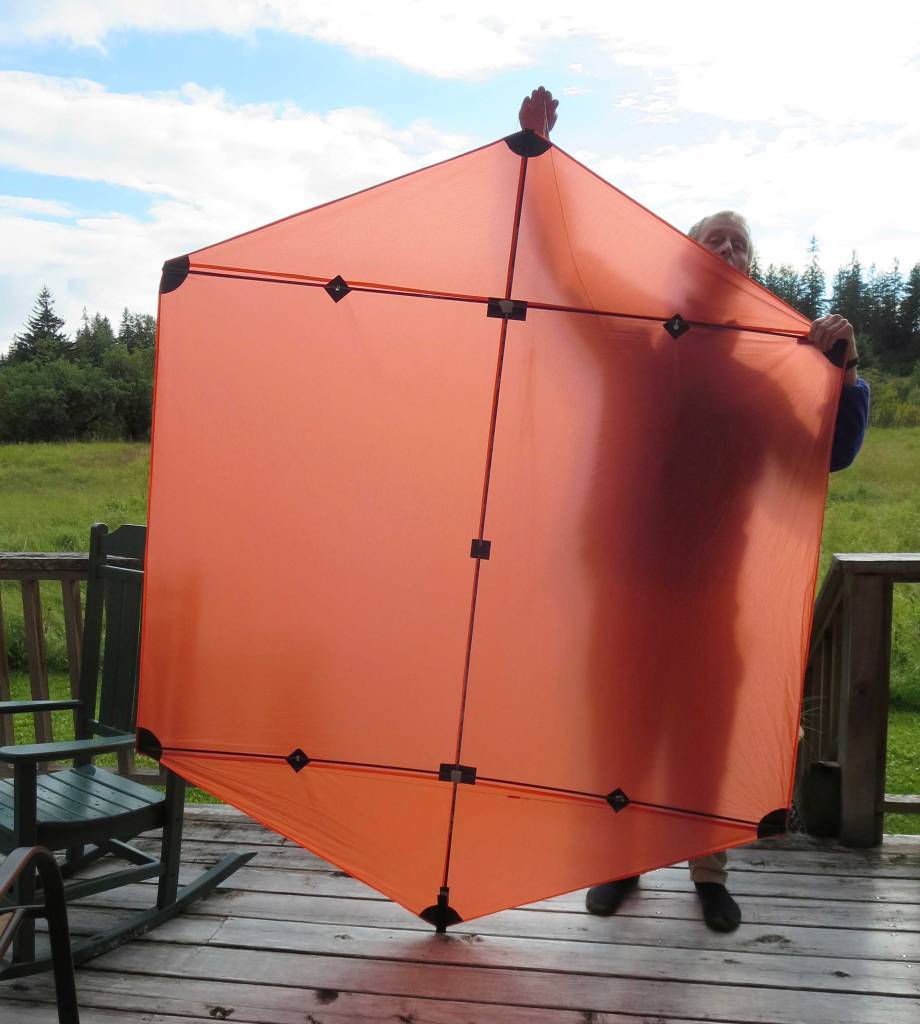
When the Sharmans visited Vermont two years ago, we flew a few kites, and Ellie seemed interested in trying to make one. I wanted to do everything I could to encourage that, so I ordered a bunch of ripstop nylon which shipped direct to her in Gustavus. I also linked to some good websites about kite making, especially Andrew Newton's KAP site and his blog about sewing a Rokkaku. It took a few months for my scheme to work, but eventually a fat envelope arrived in my mailbox with the sail for a seven foot tall Rokkaku.
 |
| A Rokkaku sail is flat, so that part of the sewing is straightforward. The more tedious part is the 13 patches required to hold the spars. Photo by Ellie. |
I built the spars and bridle and immediately learned that Ellie's Rokkaku was my favorite kite. It was also my biggest kite and allowed me to lift cameras in less wind than my other kites. Ellie did not have any kites to use as models, and had never seen a Rokkaku in action or even with its spars installed. While making the Rok she had to figure out why all the little patches and Velcro and grommets were done a certain way. I was prepared to make some modifications before the kite flew, but none was needed. Ellie got every detail right and the Rok flew beautifully the first time and also many other times that summer.
This is the first flight of Ellie's Rokkaku. There was too much wind to fly it very high, but I learned how Rokkakus deform and spill air and avoid overreacting as we all should.
When I brought the kite back to Gustavus this summer, Ellie snapped some photos to document how all the little patches hold the spars. I hope that means she was thinking of making another kite. Below are Ellie's photos in case you are thinking of making one.
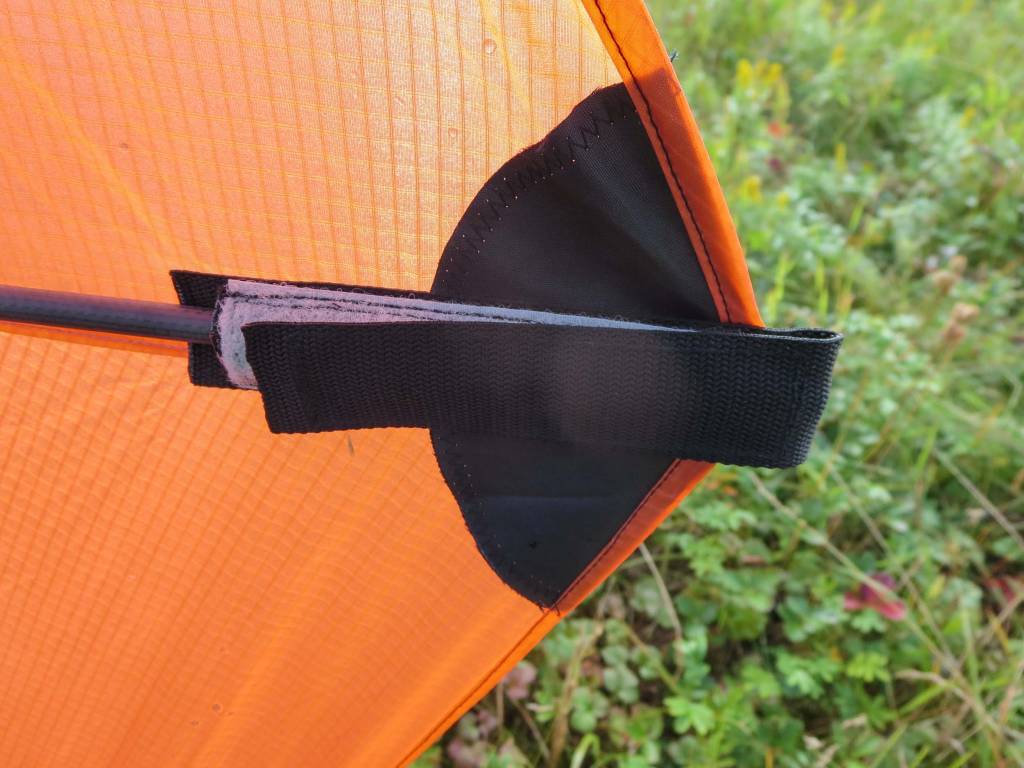 |
| At one end of the longeron spar, Velcro allows the adjustment for the length of the spar. At the other end, a simpler webbing pocket is used. Photo by Ellie. |
 |
| At the four side corners, Dacron (4 oz. Texlon) patches reinforce the webbing pocket for the ends of the cross spars. The webbing also serves as a loop to attach the tensioning line. Photo by Ellie. |
 |
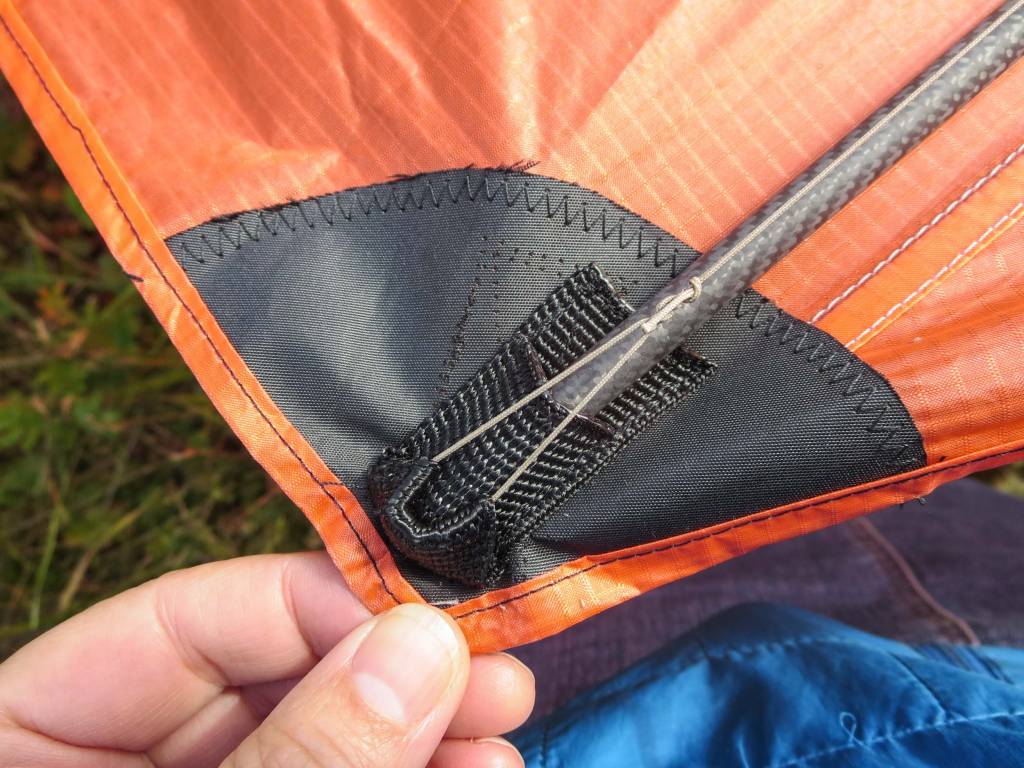
| The most complicated patches are the two where the longeron and cross spars cross. Photo by Ellie. |
 |
| Four of these grommets (with Texlon patch on opposite side) are required to pass the bridle lines to the spars. Photo by Ellie. |
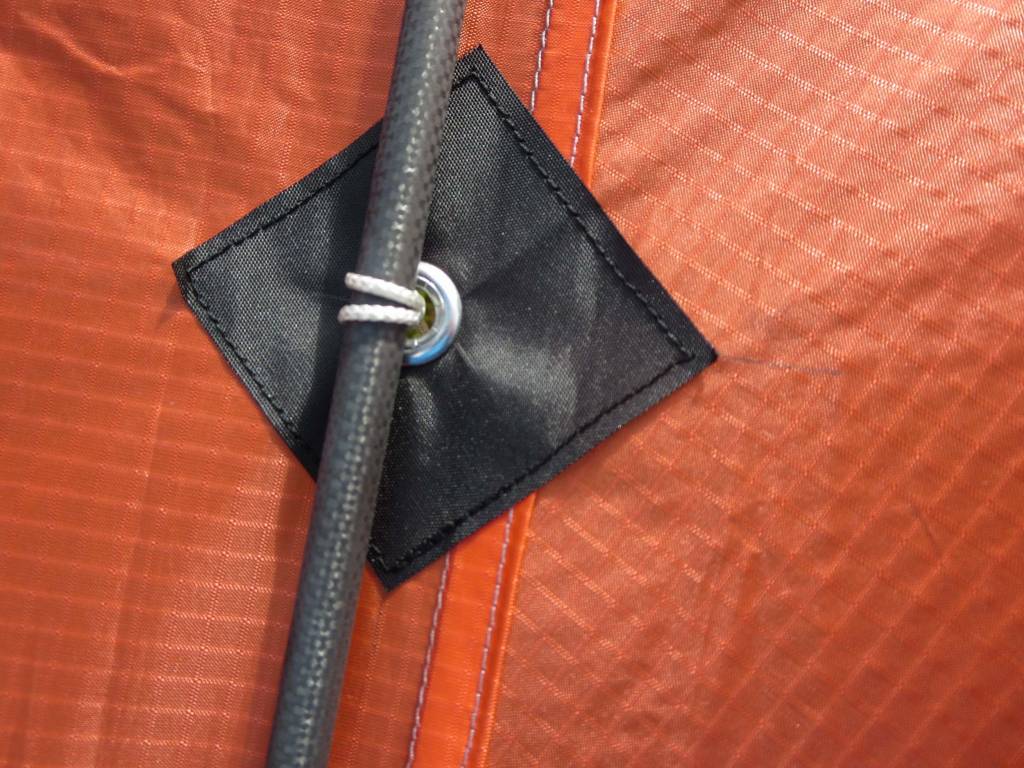 |
| The grommets with their Texlon (4 oz Dacron) patches go right next to the seam. The bridle line just wraps around the spar. Photo by Ellie. |
 |
| This patch just keeps the longeron spar from bowing along the kite sail. Photo by Ellie. |
Ellie gave me a sewing lesson in Gustavus and the specs of the sewing machine I need to make kites. Ellie used a zig-zag stitch for one of the patches on the Rok, but she said a straight stitch should be just as good for all the details. She also pointed out that sewing machines which do only straight stitches usually do a better job of it than fancy machines with zig-zag and other stitches. So a good quality, bottom-of-the-line sewing machine for $150 is all I need. Plus the courage to have a new hobby.
